Pages

Sunday, 24 February 2019

Chromatography...

 Chromatography is use in many different ways and if you kinda don’t know the definition of Chromatography, well the Chromatography is a laboratory technique for the  separation of a mixture. Example if the mixture of something is dissolved in a fluid called the mobile phase, which carries it through a structure phase. If the various is a constituents of the mixture travel at the different speed it causing them to separate.

 Liquid Chromatography:
This is used in the word to test water samples to look for. It is used to analyse metal ions and organic compounds in solutions. It also use liquids which may incorporate hydrophilic, insoluble molecules. Samples are the Police, FBI and other detectives using this liquid chromatography to solve crimes. The can used this to determine the presence of cocaine in urine, alcohol in Blood.

Gas Chromatography:
To detect bombs, identify and quantify such drugs as alcohol, use in to forensics to compare fibres. Used to analyse volatile gases. In gas Chromatography helium is used to move a gaseous mixture through a column of absorbent material as well as it is used for specific Chromatography applications in the industrial hygiene, pharmaceutical and life science industries.

Thin layer Chromatography: It is a technique used to separate non-volatile textures, it is performed on a sheet of glass, plastic or aluminium foil which is coated with a thin layer of adsorbent material. TLC ( Thin layer Chromatography) is used to help determine the number of components in a mixture, the identity of compounds and the purity of a compound.

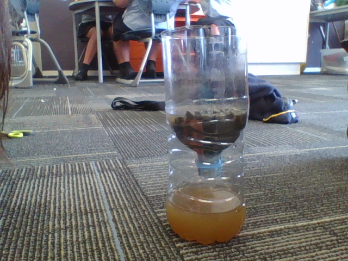
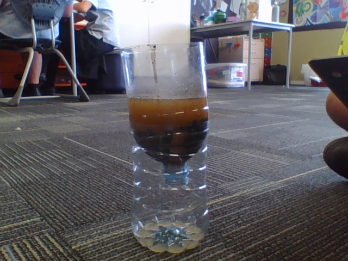
Paper Chromatography:
Is a method used to separate coloured chemicals or substances. It is primarily used as a teaching tool. Where it is used in the sequencing of DNA and RNA and is scientific studies it is used to identify unknown organic and inorganic compound form a mixture.

Rainbow paper Chromatography..

Chromatography

Aim: To separate colours by using the process of chromatography.

Definition: A technique for separating the different parts of a mixture / solid using liquid.

Materials the you need:

1. Filter Paper
2. Container
3. Felts
4. Liquid
5. Ruler
6. Pencil

Process:

Step 1: You have get one filter paper the thinner version of you normal filter paper so water can soak faster through it.

Step 2: Rule two lines on the paper with a pencil. You have to put it vertically and at the top draw a line 2 cm apart from the top of the paper and at the bottom draw a 1 cm line apart from the bottom of the paper.

Step 3: Get some felts and they have to be water based felts make sure you get three felts of any colour of your choice but ideal is black, red and green so you can get a surprising reaction.

Step 4: On the paper put 3 different colour dots with you water based felts on the bottom 1 cm line, it can be in any order of colour you want also for best result make the dots big but not to big.
Step 5: Fold the 2 cm paper line making a flap you can fold it any side you want since the colour can go through both sides.

Step 6: Grab a container or in other words a cup and hang your  paper making sure the longer side is facing the inside of the cup. - Make sure the paper is just above the bottom of the cup.

Step 7: Pour such a little amount of liquid or water into the container/cup making sure the top of the water is touching only the end of the Filter paper.

Step 8: When you’ve done putting the water at the end of the Filter paper, wait and see the reaction.

I haven’t done this experiment because I was in the other class when they’re doing this experiment but my friend told me what happened so this is what the experiment is about.
  They we’re learning about rainbow paper and what colours were they using, they said that the colour that they used is really got them confused but they said is only just at the start of their experiment but after the result of they’re experiment, the thing that Mr palmer and Whaea Jo  started to get what they were talking about. They used the colours black, red and green they are just ordinary colour but when they added the water and they said that filter paper started to soak up the liquid and get to the colour. Vase on their experiment the colours started to change the black turned into a rainbow the the red turned into pink and the green turned into a yellow and colour of the blue was cool. They said that while the colours was soaking higher more colours started to appear and the colours also spread up with the water although the bottom of black and green disappeared and was only at the top. I really want to this activity because it looks like it was really fun and  my friend said they would really recommend trying this at home and have fun doing it.

Chromatography Skittles...

Skittles


Aim: To separate colours by using the process of chromatography.


Materials:


1.  5 Skittles
2.  Petri dish
3.  Water.

Process:


Step 1:  Get one Petri dish or plate to put the skittle on and place the Petri dish on the floor.

Step 2: After you have your Petri dish on the floor get 5 Skittle any colour you like it’s optional.

Step 3: When you have your Skittle spread them out inside of the Petri Dish and spread the Skittle evenly.

Step 4: When you’ve done them get a warm water and pour the water inside of the Petri dish.

Step 5: When you’ve put the water wait a minutes or a second to see the beautiful colours flow in the middle, and wait for the reaction in the end.

Step 6: When you put all of the things inside take a picture of it and share them to your group.


In our Science we were learning about Chromatography ( Chromatography is a technique for the separation of a mixture by passing it in solution or suspension through a medium in which the components move at different rates), we did two experiments in our science today and that is Rainbow Paper and the Skittle. The skittle experiment was really fun and doing the experiment with a group. When we did the experiment there is 5 skittle placing inside of the Petri dish when we pour the warm water the colours from the skittle started spread out and the colour was a lighter shade it was so cool when we were done I was allowed to eat the skittles when we were done the experiment and I was in a group with Sheila and Rieya, and we see that the colours are trying to combined together in a few minutes and one of them are mixed and the other one in not mixed because me and my group always touching it and the colour are combined together and we kinda don’t like the colour when we mixed it. But this experiment is overall fun.

Tuesday, 19 February 2019

Dirty water Experiment.

                                        Dirty Water Experiment.
Aim: To make a filtration plant using household materials.


What is filtration?


Filtration is separating solids from liquids by adding a medium through which only the liquid can pass.

Examples are:

  1. It brewing coffee involves passing hot water through the ground of coffee and a filter.
  2. Also the kidney are an example of a biological filter.
  3. Air conditioner and a vacuum can also be a filter dust.
  4. It is also a liquid filter.

Materials

  1. One bottle to use with
  2. Paper filter.
  3. Sand.
  4. Cups
  5. Pebbles
  6. Dirty water.
  7. Scissors.
  8. Some useful container to put the sand and the dirty water.

Process - ( use verbs or doing words in each step )


Step 1

Cut the bottle with scissors and cut them into 2 halves.
Step 2
Put the funnel half upside down and place the container to put the other half, when they are joined together put a little pieces of filter paper inside so you can put the things that you need to put in the funnel.

STEP 3

Add layers of  the filter paper ( if you want your experiment to work fold the filter paper correctly into quarter), and put some sand,pebbles or rocks.

STEP 4

Get 1 cup of dirty water and place it carefully at the top of the pebbles
STEP 5
Pour dirty water into the bottle( but the water drops should be dripping slowly, but when the water is dripping so fast the experiment is kind of not correct).
STEP 6
After all of the ingredients is inside of the  funnel wait and see the reaction of the experiment. It has to be dripping slow.


Measurements

Our experiment was working really well but we kinda a bit mess up about the steps because the water is dripping a bit fast and it has to be dripping slow, luckily we were not the only ones who had the ending product. The experiment about the dirty water was really fun and I  made it with my group in my group was Shiela, Skyler, Rieya and myself. My prediction was that the water would be clear and clean but my prediction was wrong but it wasn't a failure since that was actually supposed to happen.

Sunday, 17 February 2019

Waitangi day!!

 Kumusta everyone, and welcome back to my another blog post and today I'm going to blog about Waitangi Day and I know that the Wiatangi day is important because Waitangi day is a treaty of Waiatngi.

   In our class we have been doing Waitangi lesson in our reading we've been looking for some Waitangi facts and read more about it. We also read some article that show what was Waitangi day is and some detail how the Waitangi happend a year ago. When we read those thing we have to work on some question and some task that is all about what we read on the articles. It was so interesting to find some cool stuff about Waitangi day.


   Why does the Wiatangi day celebrate?: Because it was for the significant and reflect the day in New Zealand history, Waitangi day celebrate because to have include protest and conflict. 


When does the Waitangi day happen?: Waitangi day happen on 6th of February.

How?: Well it happened when it was sighed on February 6th 1840 and it was signed by many 500 Maoris Chiefs and the British leaders representing the British Crown.

Where?: Well when the treaty of Waitangi is founding document in New Zealand. It was name from the place in the Bay of Islands where the treaty first signed, on 6th February 1840. 

But I'm a bit curious and I want to know why does it called Waitangi day, is there any reason behind it why does it called Waitang day?.

 What I learn?:
I learnt a lot of new things about Waitangi day and I learn that the Waitangi day is Celebrate on 6th of February and the Waitangi day become a nationwide public holiday in 1974. Waitangi day is the anniversary of the signing of the treaty of Waitangi which occured in 1840. But you know that in 1947 where the Waitangi day become nationwide public Holiday but on that date the Waitangi name have change to " New Zealand Day". But However in 1976 the new priminister Robert Mudoon changed the name back to Waitangi day.
   I learn how the Waitangi happened, when it happened, how it happened, why it happened and what happened.

   How I felt?: I felt so happy and proud to myself because now I know some other things about New Zealand and what is the meaning of them. I'm really so happy because I got to learn some of New Zealand history that I haven't know.

Thank you guys. Bye.